Trimming a brisket is a more important step than many realize when they’re preparing a brisket. Briskets are very large cuts of meat and they require a little bit more effort to prepare than most other cuts out there.
Skipping this step when preparing a brisket can truly be detrimental to how the brisket comes out. It could be the difference between a brisket coming out cooked to perfection or tough and dry.
Unfortunately, trimming can be a bit of a difficult task, but not impossible! All one needs is to understand the different components of your brisket and what’s necessary and what isn’t.
How to trim a brisket all depends on you and your level of expertise. The way a pitmaster would trim theirs is vastly different than how a new beginner will go about theirs.
There are several factors that go into trimming because it’s not necessarily a matter of trimming fat off of the brisket, but also other considerations such as uniformity and where to leave the fat.
To save everyone from a lot of potential confusion, the focus on today’s brisket trimming is going to be for the average backyard barbecue. Some experts still resort to using their first day skills because nothing beats sticking to the basics.
Building up your foundational trimming skills will let you learn what a good brisket needs, so from there you can keep growing and trying other styles.
What is a Brisket
Before you can start slicing and dicing away, it’s important that you understand the different parts of the brisket first! Simply put, brisket is a cut of meat located on the lower chest of beef.
I’m going to briefly go over the different areas of brisket so you have a better understanding of what you’re cutting.
Parts of the Brisket
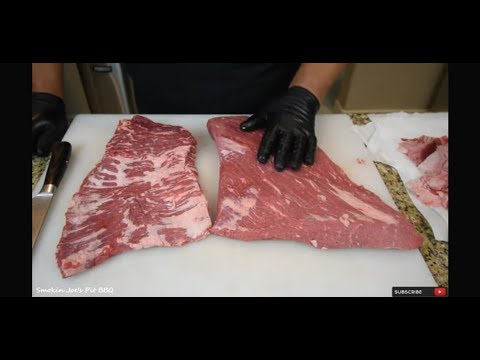
Brisket is indeed a very large cut of meat. It is so large it has essentially two different components involved called the flat and point.
- The Flat – The flat is what it sounds like. It’s flatter and will provide you with nice slices of brisket. It doesn’t have nearly as much fat as the point and is most likely to be found in stores than a pointcut if you aren’t looking for a whole brisket.
- The Point – This one is sort of an oddly shaped part of the brisket that won’t necessarily give you even slices. It’s going to be a lot more fatty which is how the point gets its irregular shape.
Also, the point is going to be harder to find in stores compared to the flat. However, it will provide more stringy pieces that can go in burritos, sandwiches, tacos, or whatever creative form you can deceive it in.
Those are the two main components of a brisket that you need to know. There are other aspects, but they aren’t as vital because those two dictate how the meat will come out when cooked.
You can buy a whole brisket even if you aren’t going to cook it all at once, you just have to separate the flat and point.
To see how that’s done, check out this YouTube video.
How to Prepare a Brisket
Preparing a brisket isn’t a difficult task, but it does require you to take your time. You should never be in a rush to prepare a brisket because it’s such a large cut of meat that it will need a lot of your attention.
However, rest assured, preparing one to be cooked isn’t difficult, just time consuming.
There are two main steps when it come to preparing a brisket:
- Trimming
- Seasoning
Make sure you block out at least 5 hours just for the preparation before you cook the brisket. The first step in the preparation process is to trim the brisket down.
Choosing a Good Brisket
Before you can even look at trimming the brisket, you have to find one first. Picking out the right brisket for the job is the first important step in the process of cooking a brisket.
Here are a few considerations to take in when finding the right brisket for you:
Grade – Picking the best quality brisket before even leaving the store starts you off on the right foot to a successful brisket. Though how you prepare and cook it, really is the ultimate test, to reap the true reward of your brisket consider a Wagyu beef.
Fat – A lot of people think too much fat is a bad thing, and this may be so, but when you’re shopping around for a brisket that’s not always the case. It’s better to have it and not need it, than need it and not have it, meaning you can always trim the fat off, but you can’t put it on.
Picking a brisket that has an excessive amount of fat on it is more desirable than one that has little, but still, try and find one that is moderate. Trimming is already a more technical part of the cooking process, so make it easy on yourself.
A good rule of thumb is the brisket should have no more than 1 inch of fat on it, any more and you’re paying more money for fat that will just be cut off anyway.
Other Essentials for Trimming
- Knife – A typical chef’s knife will suffice if it’s all you have, but a fillet knife is highly recommended to save time and energy.
- Cutting Board – For trimming brisket, you’re going to need a pretty big cutting board. Again, if your cutting board isn’t big enough to handle the whole brisket that’s fine, it’s just going to take a little bit longer and maybe some extra patience is all.
- Gloves (optional) – Most veteran pitmasters are seen wearing gloves because they’re handling raw meat. It’s not a total essential item, but it does help practice good hygiene. If you can’t get some gloves to wear that’s okay, just be sure you are extra careful with what you touch after you’ve handled raw meat and stay on top of hygiene.
How to Trim a Whole Brisket
Now that you have your cutting board, knife, brisket, and knowledge, it’s time to get started. This guide is going to be for trimming a whole brisket, instead of just a point or flat only.
First things first, for all the perfection artists out there, now is a time to set aside those tendencies because your brisket will not look perfect. That’s okay though, because each brisket is cut differently, so there’s no such thing as a perfect brisket.
Now, let’s get started!
Step 1. Identify the Flat and Point
After you’ve taken your brisket out of the wrapping, lay it flat and locate the point and flat.
You’ll notice that one end of the brisket is uneven, knobby, and has a lot more fat than the other, that will be your point. On the other end, it will be a little more square and less fat, this is your flat.
Step 2. Trimming the Flat
Flip the brisket over so that the flat is facing up.
Look over your flat and spot any pieces of fat that seem to be excessively sticking out. Take your knife and now start to trim those pieces off making the flat nice and, well, flat.
Uniformity is key to ensure that the brisket is cooked evenly.
You should also find a strip of fat that is pretty thick, running almost diagonal on the brisket. Go ahead and trim that so it’s flush with the flat because this is the separation from the flat and point.
After you’ve identified and trimmed all excess fat, look at the sides of the whole brisket and trim them very lightly so that all 4 sides are flat and even.
This will open up the brisket more so you can see it and also it will let the smoke and heat penetrate more of the meat.
Step 3. Trimming the Point
After you have the flat trimmed, go ahead and flip the brisket over again so that the knobby and fatty side is facing up.
You’ll notice this side is a lot fattier than the flat and that’s okay. What you’ll do now is go over all the fat and trim it away leaving about ¼ inch layer.
If you leave anymore than that then not enough smoke and heat will be able to get to the meat and the brisket won’t come out as good.
What you’ll also find a fat cap, once again trim this down till there is ¼ inch layer of fat.
Step 4. Separating the Flat and Point
Staying on the same side of the brisket, identify the end of the brisket that has the point and flat on the same side. You should be able to see the separation since you trimmed all the sides as it will be parted away from each other by a layer of fat in the middle of the meat.
Take your knife and slowly start to cut into this, cutting the brisket in half. Only run a few inches deep as we aren’t going to completely separate them, just the beginning.
Cut out any excess fat that separates them on your incision.
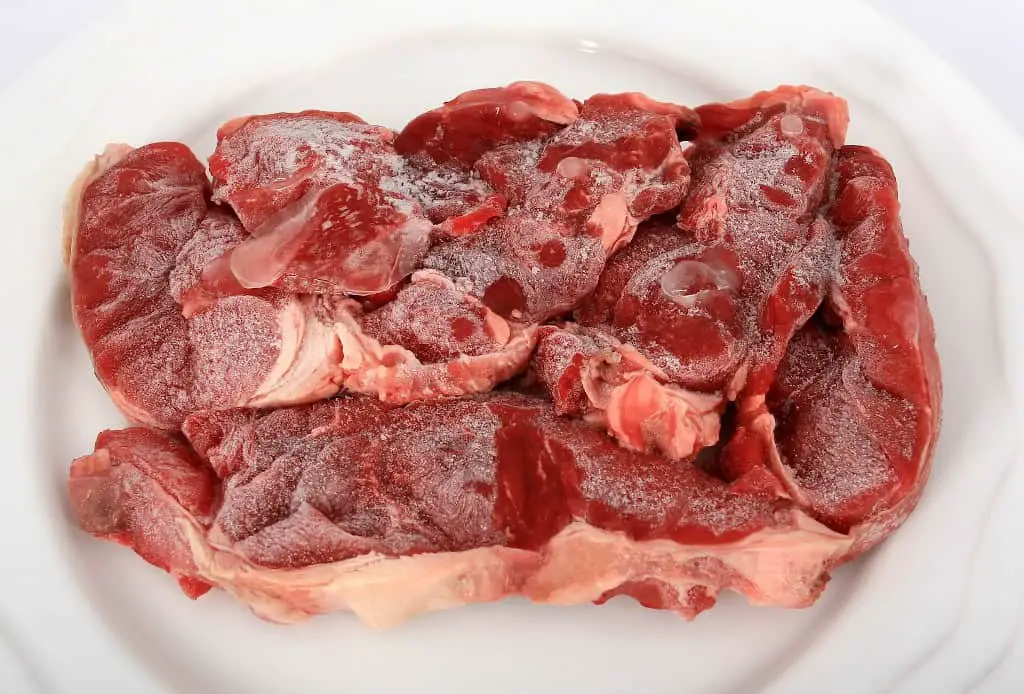
Step 5. The Excess Fat
Believe it or not, you’re done trimming the brisket. The hardest part is over! Just do a double check to make sure that the brisket is looking uniform and as even as possible.
But, now you have all this excess fat and maybe even some meat trimmings. Instead of throwing them away, you can reuse them. This gives you a chance to really get all of your money’s worth out of the brisket.
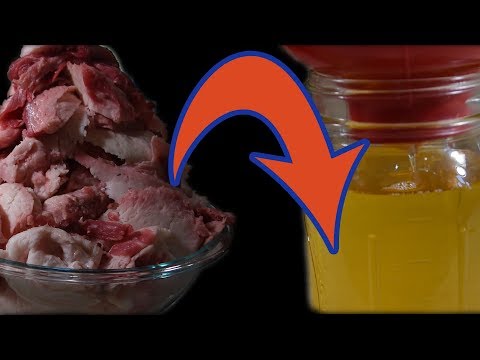
You can use it to make butter with so the next time you fry something on your cast-iron it has an amazing kick to it. Or if you are making burgers and want to add some fat to the lean meat that really adds such a great flavor.
Others use the fat to turn it into tallow, so they can make things like lotion and soap.
To see how to render the fat, here is a YouTube video to get you started.
How to Season a Brisket
Trimming is pretty universal, however, seasoning is heavily dependent on what you’re looking to produce.
Traditional Texas-style seasoning is going to be very simple with ingredients such as salt, pepper, garlic, onions, and heavy amounts of wood chips in the smoker.
A little secret is to rub the whole brisket in Worscheteriser sauce to ensure that your seasonings stick to the brisket.
Once you’ve gotten your brisket seasoned place it in the fridge for 4 hours before you begin to cook it.
Quick Reference Table
If you’re in a hurry, you’ll see a table below that has all the steps you’ll need to cook a brisket from start to finish.
| Steps | Details |
|---|---|
| Buy a brisket | Find the right brisket for the job! Look for a brisket that doesn’t have too much fat, but make sure it doesn’t have too little to start. You can always trim it off and use the fat for other things like butter, tallow, or even burgers. |
| Trimming | Trim the excess amount of fat on the Flat making sure it’s an even and smooth surface. Trim all the fat down to ¼ inch on the Point. Cut straight even lines on all 4 sides of the whole brisket. |
| Season | How you season depends on how you want it to taste. You can’t go wrong seasoning it Texas-style with garlic, onion, salt, and pepper. Be sure to run Worschesire sauce on the brisket first before you do season to ensure all seasoning stays on. Once seasoned place in the fridge for 4 hours prior to cooking. |
| Cook the brisket | After the 4 hours is up, start the cooking process. Smoking, oven, or however you decide to cook it is on you. Expect this part to take quite a bit of time, maybe 5-6 hours depending on how you want it done. |
| Cooling it Down | Once you’ve reached at least 195 degrees Fahrenheit, pull the brisket out, wrap it with paper or foil, and let it cool down for 15-30 minutes. After the cool-down period, it’s ready to serve! |
FAQ
How to Prepare a Brisket For the Smoker
Preparing your brisket for the smoker is roughly the same process for the brisket itself, however, the only difference is knowing when to prepare the smoker.
For the best results possible set your smoker to 325 degrees Fahrenheit an hour before you want to actually begin the cooking process. It takes your smoker a little bit of time to fully reach the cooking heat you want to smoke your brisket at.
Additionally, you don’t want to set your brisket in there to start cooking without the flavor of the wood chips at their peak. This could seriously miss a lot of flavor potential for your brisket.
How to Tell When Brisket is Done
Ideally, you’ll want to use a food thermometer to check the internal temperature and make sure it’s safe to eat. If you don’t have a food thermometer then there is another option you can do instead.
Poke test – Take a clean knife and poke it into the middle of the brisket; if it goes through with little to no resistance, then it’s ready.
After you’ve determined that the brisket is completely done, don’t forget the next important step in the process. The rest.
Take your brisket out, wrap it up in paper or foil, and let it rest for about 15-30 minutes. This will allow the brisket to save as many juices without drying out as you let it cool down from being cooked.
What is the Temperature of a Brisket When it’s Done
This is where a solid food thermometer comes in handy because you can stick it in and see what the temperature is at.
Since the brisket is so large, the minimum internal temperature of the brisket should be 195 degrees Fahrenheit. The maximum you want it to be is around the 215 degrees range because this cut of meat is so large, it’s easy to dry it out and make it tough.
Conclusion
Taking on the task to trim and prepare a brisket is no easy feat. It is by far one of the largest cuts available and it does take a lot of love and care to execute it right. Carving out the patience and time to do it right will leave you with one of the best tasting briskets you can ever make.
The first one is always the most difficult one to do right, so give yourself some slack if you struggle at first, because it only gets better from here. We all learn from our experiences and mistakes, so be proud of your creation when it’s done, no matter how it turns out.
Don’t be afraid to experiment with your briskets because there are so many ways to go about each different step in the cooking process. You’ll come to learn that each step is so vital to be careful with because it can drastically change the end result.
Use your newfound knowledge and creativity to perfect your brisket cooking game!