Masterbuilt was founded in the 1970s. Over the past 50 years, they have proven themselves to be the premier provider of smokers. Since their first fish cooker, they’ve evolved quite a bit. Today, it’s easy to recognize Masterbuilt by their available line of electronic smokers.
If you are considering a Masterbuilt purchase, it can be easy to be overwhelmed. If this is your first electric smoker, there’s a lot you need to know.
While Masterbuilt does well to provide complete instruction manuals, a guide on how to start will help you move along. For the rest of this article, I will dig into a beginner’s guide on how to use a Masterbuilt electric smoker.
How to Use a Masterbuilt Electric Smoker
Step One: Choosing The Right Electric Smoker
If you haven’t bought your electric smoker yet, this is where you need to start. This short guide will provide you some tips you will need to pick out the right electric smoker. Keep the following in mind:
- The capacity, or size, of the smoker, needs to be enough to handle; however you plan to use it.
- You need to measure where you can safely hook it up to your house without being a fire hazard.
- Ask yourself what features you need.
Let’s dig into the details:
Size
Ask yourself if you plan on using it for your family or anyone beyond that. If you want to use it for small community events, you will need something of larger capacity. Masterbuilt typically works with two major variants:
- 30-inch electric smokers
- 40-inch electric smokers
Thirty-inch smokers will handle the needs of a family of five or less. If you cook for larger groups, limit your purchase to the 40-inch options.
Where Will You Put It?
As you might expect, electronic smokers need access to an available outlet. Without an outlet, you won’t be able to hook it up.
Commonly, people put their electric smokers in their garage. This location ensures that the smoker has a place to let the smoke escape while staying dry. Otherwise, stick to an outdoor kitchen or an area with an overhang.
What Features are Necessary?
Electronic smokers have a variety of features that can affect the price. You need to list out those features and define which ones you are willing to eliminate.
When it comes to electric smokers, Masterbuilt has two major overall categories:
- Digital Electric
- Analog Electric
Analog electric smokers have fewer available options and typically cost half the price of digital options. One key component of analog smokers is the dial used in old-style smokers to control how open the vent stacks were. In modern applications, this dial controls the temperature level.
Digital electric smokers have a small LCD that allows you to view the internal temperature and remaining time. In many cases, these also include other advanced electronic features. They sell a 40-inch digital electric smoker with Bluetooth controls from your phone.
[humix url=”https://electricsmokerhq.com/humix/video/6AxWAYOcOrf” float=”1″ autoplay=”1″ loop=”1″]
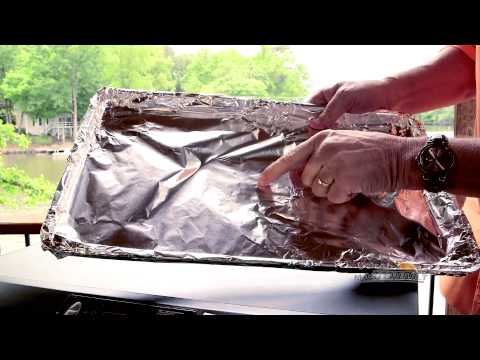
Step Two: Seasoning Your Smoker
The next step you need to be concerned about is seasoning your smoker. The process is similar to charcoal smokers; you will be using fewer wood chips to start the process. Owning something straight from the factory can be exciting, but you don’t want your meat to taste like the factory.
Follow these steps:
- Assemble the smoker, following the instructions closely to make sure everything is in the right place.
- Turn on the electric smoker and set the temperature to about 275 degrees Fahrenheit.
- Set a timer for two hours and fifteen minutes.
- When your timer goes off, place a handful of wood chips in the tray.
- Set another timer for 45 minutes.
You will burn off any remaining dust during this process. Feel free to use wood pellets if that’s what you have.
What If I Don’t Know How To Assemble My Electronic Smoker?
Instructions for assembling your smoker are with your instructions manual. If your instruction manual isn’t immediately available, look it up on Masterbuilt’s website.
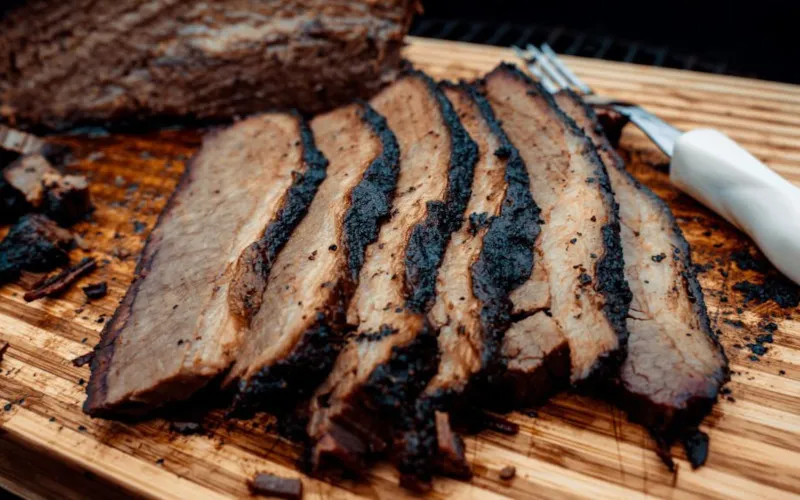
Step Three: Cooking Your First Meal
Once you’ve finished seasoning your smoker, your next step is to cook your first meal. To do this, you need to have an awareness of how your meat needs to be cooked. You will also need to know how to preheat your smoker.
How To Preheat A Cold Smoker
- Start by loading it with wood pellets or chips (depending on your preferences).
- Set the smoker to your desired temperature.
- Allow the smoker to preheat for about an hour.
- Add a handful of wood chips or pellets.
- If the smoke stops, add in more wood chips.
What Temperature Does Your Meat Need To Be?
Each type of meat needs to have a different internal temperature. While there may be slight variations up, all of them need to be at this bare minimum so you can consume the meat safely:
| Type of Meat | Minimum Internal Temperature |
|---|---|
| Chicken | 165 degrees Fahrenheit |
| Pork | 145 degrees Fahrenheit |
| Fish | 145 degrees Fahrenheit |
| Steak | 145 degrees Fahrenheit |
| Ribs | 145 degrees Fahrenheit (higher temperatures for more render) |
To determine what the internal temperature is, you will need to purchase a meat thermometer. Many Masterbuilt models already come with a built-in thermometer or temperature probe, so check the details before you make a purchase. You can just as easily buy a separate thermometer.
Putting Your Meat in the Smoker
With an awareness of internal temperatures and access to a thermometer, you can comfortably put your meat inside of the smoker. Whenever you open the smoker, expect a massive smoke puff to hit you in the face. To avoid this, stand to the side so that the initial wave of smoke passes by you.
Meats that require higher temperatures (or have higher tolerances) need to go up top. That means well-done steak, ribs, and chicken need to be on the upper racks. Heat rises, so these will always be your starting point. Fish and pork need to stick to the bottom shelves.
Be quick about placing your meat inside of the smoker. Losing too much heat could cause your meats to be cooked unevenly.
Step Four: Checking Your Meat
Typically speaking, many smokers have a “set it and forget it mentality.” However, electric smokers usually have a bit more care for them. Here are the reasons why:
- Electric smokers have a much smaller wood tray, so they burn off much faster.
- These smokers have a water tray to maintain moisture in the unit.
The smaller space for both of those items means that you typically need to check them once every hour. Each Masterbuilt electric smoker has a different requirement based on tray size, so check your owner’s manual for details. Your meat is ready to eat once the internal temperature matches the above guidelines.
Step Five: Removing Meat From the Smoker
After you’ve confirmed the internal temperature meets your demands, pull the meat out. For well-done items and specific recipes, you may need to wait for a bit. When it is removed, keep the following in mind:
- Let your meat rest. One of the most critical steps that people always forget is resting your meat. This will allow the juices on the inside to settle. Also, you won’t feel like you are eating lava.
- If the outside doesn’t meet your crisp requirements, put it back in for thirty minutes to an hour.
How Long is the Cooking Time for Most Meats?
The minimum cooking time for any meat is around three to four hours. That shorter time is typically limited to fish, which doesn’t spend much time inside the smoker. This doesn’t include additional flavor-adding activities like brining.
The longest cooking time you may run into is about 12 hours. Things like pork shoulder or other tender items see long cook times. The best examples of smoked meat almost always are day-long processes.
How To Clean A Masterbuilt Electric Smoker
There are two different cleaning processes we will go over in this section. First, we will review what you must do after every cooking session. Second, we will review what you must do after multiple uses.
How to Clean Electric Smoker (After Use)
- Wait for the smoker to cool down, so it is safe to touch.
- Remove the wood tray from the side and shake out any ashes.
- Remove all of the trays and racks.
- Clean any removable parts in the sink with a mild hot soapy water mix.
- Spray the inside with a combination of apple cider vinegar and water.
- Wipe out the inside with a sponge and remove any remaining moisture with a paper towel.
This guide was inspired mainly by Masterbuilt’s own YouTube page. Check out their video on the subject below:
How to Clean a Tough Mess from Your Masterbuilt Electric Smoker (Like Mold)
There comes a time when you may forget about your smoker. I’ve done it, my friends have done it, and I know other people who have made the same mistake. All smokers can have a few missed spots, and those spots can sometimes attract mold.
Thankfully, smokers have a natural weapon against mold: heat. Follow these steps for a deeper clean:
- Make sure that your smoker is incredibly hot.
- Do not begin scraping or washing while the mold is hot. You need to wait for it to cool.
- Once cool, use a brush to remove the disgusting parts of your smoker.
- Remove any parts you can to wash in soapy water.
- Heat up the grill again if you need to perform an additional clean.
- Repeat this until you get a squeaky-clean smoker.
Masterbuilt grills are also known to handle pressure washers, so go ahead and rent one of those if you have a provider in your area. Many hardware stores have them readily available. You can also follow the same steps to remove caked-on heat.
Why Is My Electric Smoker Not Getting Hot Enough?
This is typically caused by two issues:
- Check your digital temperature settings to see if they are at the right level. Adjusting those may adjust the level of smoke escaping from your smoker.
- Compare the temperature of your digital screen with another thermometer that you can confirm is working. It could be your digital reader is busted.
This brings up one of the more significant weaknesses of electric smokers. You cannot typically adjust the vents to get the desired temperature you want. An electric smoker not getting hot enough requires you to contact customer support for guidance in many cases.
Frequently Asked Questions
Do You Soak Wood Chips in Masterbuilt Electric Smokers?
Typically, electric smokers do not work with soaked wood chips. This is generally limited to analog smokers, who tend to burn very hotly if there is too much dry wood. Masterbuilt has most of its wood chip boxes at the bottom, which has low exposure to heat.
Is It Safe to Leave an Electric Smoker Unattended?
If you have recently purchased your electric smoker and your first cook, keeping a close eye on it is best. You never know when a factory defect will cause a major malfunction.
After the second use, you don’t need to fret over your smokers. Many smokers are activated for several-hour-long periods over a day. To camp over a smoker for twelve hours would eliminate the purpose of slow cooking. At the bare minimum, check your smoker each over to refill the wood chips.
How Often Should I Add Water to My Electric Smoker?
Add water at the same frequency that you add the chips. If you do so on the same schedule, you will give yourself one less thing to worry about.
Final Thoughts
Masterbuilt is a company with a long tradition in the smoker industry. Since the 1970s, they have produced a high-quality product that has allowed aspiring smokers to quickly meet their dream.
If you are purchasing your first smoker, Masterbuilt is an easy company to get started with. Their brand I associated with quality, meaning that their customer service team understands these expectations. Even if an error were to occur, they would be on it.
You should have a solid understanding of how to get started with your Masterbuilt electric smoker through this guide. Suppose you need help picking out a specific smoker. In that case, I recommend checking out my other articles on the best overall smokers.


just set up and pre seasoned my new DES MES 130B. i could not be more disappointed in the changes MB has made over my previous model, 20070213. this unit will not smoke the wood chips at 190-210. Hence it is almost impossible to smoke anything. even though i set it at 275 to get the smoking going, once i lower the temp for proper cooking, the smoke generation stops. not sure why MB changed the smoker box configuration from the previous model, but this one just doesn’t do the job.
any suggestion on how i can get the wood chips to smoke at 190-210?
Much appreciated.
Hey William,
From what I’ve found, to get your wood chips to smoke at the right temperature, they need to have some moisture content. You can try getting wood chips that have moisture in them and avoid using kiln-dried chips, which are usually too dry to produce smoke vapor. Also, to keep the smoking going, try adding more wood chips to the tray every time they burn up. It’s also helpful to hold the door open slightly to release some heat, which will force the heating element to kick back on and get the wood to smoking again.
Keep in mind that different types of wood smoke at different temperatures – typically between 570 and 750°F (299 and 399°C) – so make sure to check the temperature range of your smoker and adjust accordingly to reach the desired temp of 190-210°F. Hope this helps!